Base Zoning — Functional Layout
- Production zone (center): workbenches, furnaces, assembly lines — keep it flat and close to storage.
- Ranch & farming zone (one edge): breeding farm, berry plots, ranch building — pals wander, so fence it loosely.
- Storage zone (adjacent to production): chests within a short walk of every workstation to cut transport time.
- Defense zone (perimeter): walls, traps, and a "combat pal" perch overlooking the raid path.
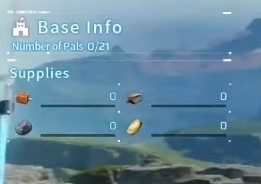
Pro tip: pals only work inside the base circle (the ring shown when you open the Pal Box menu). Keep every station inside it.
Building Blocks & Unlock Tech
| Block | Tech | Use |
|---|---|---|
| Wooden Wall / Floor / Roof | Tech 4+ | Starter shelter — cheap but flammable |
| Stone Wall / Floor | Tech 10+ | Mid-game; resistant to raids |
| Metal Wall / Floor | Tech 30+ | Endgame; near-impenetrable |
| Gate & Door | Tech 6+ | Single entrance chokepoint for defense |
| Ladder / Ramp | Tech 3+ | Vertical access to roof & perches |
Power Generation
- Pal Generator (early): assign electric pals (e.g. Zoe's Grizzbolt) — free energy but they must rest, causing blackouts at night.
- Fuel Generator (mid): burns fuel 24/7 with no pal downtime — the reliable choice once you have fuel production.
- Coverage: one generator feeds nearby stations within ~20m; place it centrally and wire the key machines close to it.
💡 Recommended path: Pal Generator early → Fuel Generator as soon as you unlock it → keep 2 electric pals on the Pal Generator as backup.
Automated Production Lines
- Mining: place a Mining Site (ore node) and assign a mining pal (Cattiva, Rushoar, Anubis).
- Transport: a transporter pal (Cattiva, Nitewing) hauls ore to storage automatically.
- Smelting: Furnace next to storage — smelting pal converts ore → Ingots.
- Crafting: Assembly Line / Workbench beside the furnace; handiwork pals produce gear.
- Check SAN: keep beds + food near the loop or the whole chain stalls.
Endgame goal: one base does ore→ingot→gear fully hands-off. It's the single biggest time-saver in the game.
Raid Events & Defense
| Defense layer | Cost | Effectiveness |
|---|---|---|
| Perimeter walls (stone+) | Low | Slows raid, forces chokepoint |
| Wall-mounted turrets | Medium | Auto-damage raiders; needs ammo |
| Combat pal perch | Free | Assign 2-3 strong combat pals on high ground near the gate |
| Traps (spikes, mines) | Medium | Burst damage on the raid path |
Raids scale with base level and build count. Early raids are beatable with 1 strong combat pal; by mid-game you need a real defense line. Keep your Pal Box well guarded — destroying it fails the raid and deletes your base progress.
FAQ
Raid defense is layout, not firepower
Raid events target structures and pathfind toward your Pals, which means the layout is the defense: hardened perimeter walls slow the wave, elevated turrets cover the approaches, and the working stations sit deep enough that production resumes before the raid banner fades. The base's combat Pals are the second line — the plan is that they never need to be the first.
Zoning by workflow, not by aesthetics
The functional layout that scales: a production corner (workbenches near storage), a food corner (farm plot, feed box and cooking station in a triangle), a power corner (generators away from living quarters), and defense sightlines that cover all three. Pals path more honestly than players do — walk the routes they will walk and delete the chokepoints before the raid tests them.
The base circle rule, in practice
Everything on this page assumes one law: Pals only work inside the base circle shown in the Pal Box menu. Every station outside it is decoration, every pathing complaint traces back to a workshop straddling the ring, and the fastest fix for a lazy base is a smaller footprint with every station inside. Plan the circle before placing the first wall, not after.